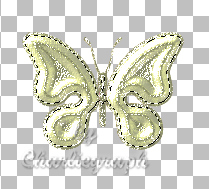
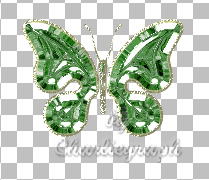
Tutorial PSP - Make ButterflyJewel
Copyright © Charlieonline.it 2002 - 2026Tutti i diritti riservati

Return to Tutorials
Please read my TOU's ==> HERE
Copyright © Charlieonline.it 2002 - 2026
Tutti i diritti riservati
Tutorial written by ©charlieonline graphics
Any resemblance to any other tutorial is purely coincidental.
Please feel free to link to this tutorial,
and/or print it out for your own personal use,
BUT do not upload, share, or re-write or translate it without permission.
Besides you may not script it and sell the script.
You may not sell works from my Presets or Tutorials
All my works are for personal use only, and with no profit-websites
Anything made from my tutorials is for personal use,
and may not be used on commercial sites or blogs.
When displaying the results from my tutorials, a link to this site is required.
It goes without saying that my resources cannot be used for anything
pornographic, obscene, deflamatory, or in violation of the law.
Thank you!
This tutorial was written using PSP9
but may be done with other versions,
and assumes you have a good working knowledge of PSP and its tools.

Supplies needed: HERE
Plugins: FlamingPear - SuperBladePro
You can find some Plugins and Presets HERE
The Gold Christmas presets is a ©Elizabeth's SBPro Presets
The GemStonesPresets is ©Karen
Please Respect the TOU
NOTE: I enclosed the Karen's presets for mistake.
Sorry for that. I have eliminate them from materials.
But you can download them from her site.
(Sorry for the trouble.)
You can find some ButterfliesJewels HERE
Settings
Extract and save the Butterflies.shapes to your Presets Shapes folder.
Save the GoldPatterns to My Documents\My PSP Files\Patterns folder
Extract and save the SuperBladePro Presets,,
goldchristmas, ks_gemstones presets and ks_gemstones bitmaps,
to your Plugins/SBP-Presets folder.
for Win XP pro is:
C:\Programmi\JascSoftwareInc\PaintShopPro 9\Plug-in\FlamingPear\SuperBladePro\environments and textures
Set the foreground to White
and the Background to GoldPatterns
Remember to save often.
Let's Begin!!
1 - Open a new image 300x300 px, transparent background;
Raster background checked; Color depth 16 million colors
Open the PresetShape tool

pick out the SK Butterfly 09.PspShape
and with the GoldPattern setting (the foreground null),
draw your butterfly
Be Careful!!. If you like having my same result,
you have to draw your butterfly a little small.
I have done it big too, but in my opinion the result is not good.
In any case I use this settings:

Layers - Convert to Raster Layer
Selections - Select al
Selections - Float - Defloat
Effects - Plugins - SuperBladePro
click as below:

on the above window you have to look for goldchristmas folder
so click on lizs_christmasgold.q5q
Follow the directions
and when you have to apply the bitmap texture required
click OK
Keep Selected!!
Selections - Modify - Contract 3 pixel

Press the Delete Key
Selections - Promote Selection to Layer
Selections - Modify - Expand 1 pixel
Keep Selected!!
2 - Add New Raster Layer
and with the foreground White active
fill the selection. Layers - Arrange - Move Down
Keep Selected!!
Open again SuperBladePro,
now you have to look for ks_gemstones presets folder
click to ks_gemstone emerald.q5q
Follow the directions and apply the bitmap texture required
Be Careful!
There are 2 folders for gemstones presets, that is:
ks_gemstones presets folder and ks_gemstones bitmaps folder
so you can close the presets and open the bitmaps folder
to look for the texture required
when you have applied texture click OK
Note: I used the Emerald preset because it is easier to colorize,
but you can use what you like!
3 - Selections - Modify - Contract 15 pixel
In any case you have to contract the selection
till to obtain the one as the screen below:

Press the Delete Key
Selections - Promote Selection to Layer
and with the foreground White active
fill the selection.
Keep Selected!!
Open again SuperBladePro,
and apply again ks_gemstone emerald.q5q
Be Careful!!
If you draw a big butterfly,
you have to repeat the last step till to eliminate
the greendark colour in the selection.
Layers - Merge Down
Below is what you have to obtain

Now before you merge your jewel to the gold border,
if you like you can colorize it using:
Hue and Saturation - Colorize
When you have finished your colorizing, go to
Layers - Merge Visible
and save as .pspimage
Note
Below you can see the big result of the same settings
of the tutorial(resized to 80%)

I try to change the Radius in my settings
from 15 to 50, but I don't like much.
Below my result:

Done!
I hope you enjoyed this tutorial.
If you have questions or need clarification
post a message to my Contacts.
Written on March 2009
Return to Tutorials

My Tutorials are Registered at TWI

Per informazioni o suggerimenti
If you like write a message to my "Contatti"
Se hai dubbi o ti servono chiarimenti posta un messaggio nei "Contatti"
Copyright © Charlieonline.it 2002 - 2026
Tutti i diritti riservati
Torna all'inizio


Questo Sito è pubblicato sotto una Licenza (This website is licensed under a)
Creative Commons Attribuzione - Non commerciale - Non opere derivate 2.5 Italia License.