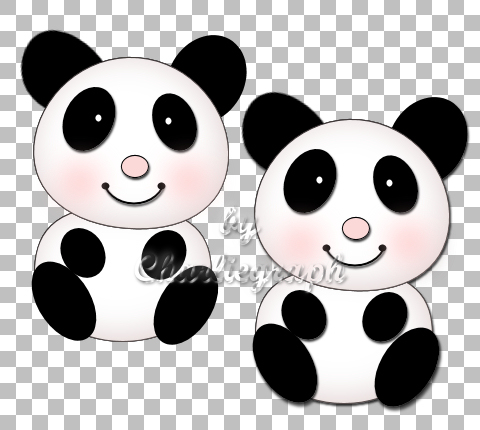
Tutorial PSP - How to Make a Panda
Copyright © Charlieonline.it 2002 - 2026Tutti i diritti riservati
Return to Tutorials
Please read my TOU's ==> HERE
Copyright © Charlieonline.it 2002 - 2026
Tutti i diritti riservati
Tutorial written by ©charlieonline graphics
Any resemblance to any other tutorial is purely coincidental.
Please feel free to link to this tutorial,
and/or print it out for your own personal use,
BUT do not upload, share, or re-write or translate it without permission.
Besides you may not script it and sell the script.
You may not sell works from my Presets or Tutorials
All my works are for personal use only, and with no profit-websites
Anything made from my tutorials is for personal use,
and may not be used on commercial sites or blogs.
When displaying the results from my tutorials, a link to this site is required.
It goes without saying that my resources cannot be used for anything
pornographic, obscene, deflamatory, or in violation of the law.
Thank you!
This tutorial was written using PSP9
but may be done with other versions,
and assumes you have a good working knowledge of PSP and its tools.

Supplies needed:
Only Ellipse Tool - No Plugins

Settings
Set your Foreground to black
and Background to white
Remember to save often.
Let's begin!!
1 - Create a New Transparent Image 500x500 pixel - 200 DPI
Raster Background checked - 16 million colors
We begin creating the Head
Open your Preset Shape Ellipse Tool on the left
and with your Foreground to black
and Background to white
draw out an ellipse setting like this
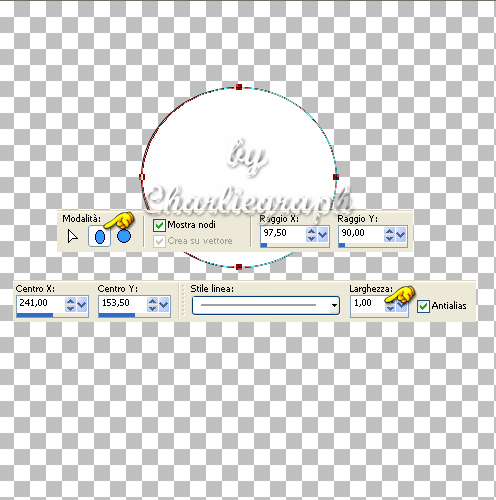
Right click - Convert to Path
Add nodes and shape your ellipse something like this
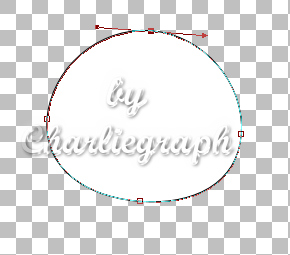
Convert to Raster Layer
Rename as head
##***## Selections - Select all
Selections- Float
Effects 3D - Cutout as below
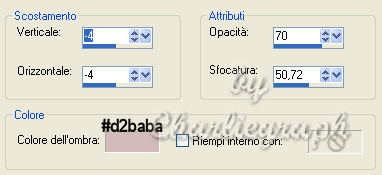
Selections - Select none ##***##
2 - Set your Foreground to null
and Background to black
and with your Ellipse
draw out another one setting like this
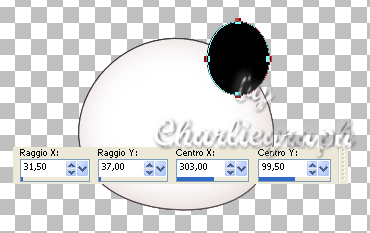
Click at Object Selector Tool
Left click on the handle at the arrow.
Keep it down and turn the Ellipse a little bit as below
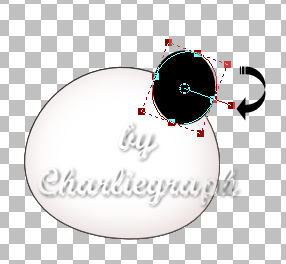
Right click - Convert to Path
Click at your Pen Tool
Add nodes and shape your ellipse something like this
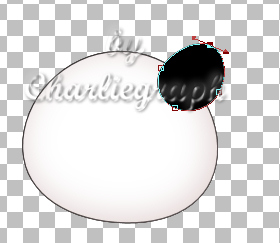
Convert to Raster Layer
Rename as ear1
Layer - Arrange - Send to Bottom
Duplicate
Immage - Mirror
And with your Mover Tool
place it as the finished work
3 - Open again your Ellipse Tool
and draw out an ellipse setting like this
Click at Object Selector Tool
Left click on the handle at the arrow
Keep it down and turn the Ellipse to your right,
just a little bit as below
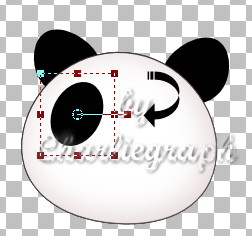
Duplicate
Return to the original layer
(make sure it is active)
Convert to Raster Layer
and remane as eye1
Return on your duplicate layer
Immage - Mirror
Resize it a little bit with your Object Selector Tool
as the finished work
Convert to Raster Layer
and remane eye2
And with your Mover Tool
place it in the right position
See the finished work to help you
Stand on layer eye2
keep foreground to null, change background to white
and with your Ellipse draw out a small one for the pupil
See the finished to help you
Convert to Raster Layer
Duplicate and with your Mover place it on the eye1
4 - Unclose foreground, set to black
and change background to #fbd9d9
and with your Ellipse Tool
draw out an ellipse setting like this
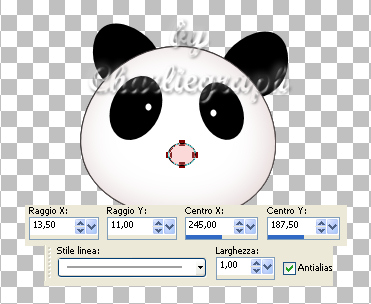
Convert to Raster Layer
and rename nose
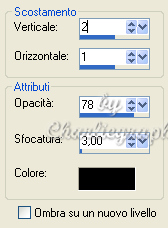
At this point if you like apply a Drop shadow both the nose and the eyes. I set mine as below
5 - Now set your foreground to black and background to null and draw out an Ellipse setting as below
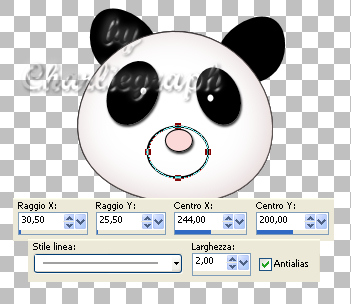
Convert to Raster Layer
and rename mouth
Click at your Selection Rectangle Tool
Antialias = checked
Mark the part you will delete to create the mouth like this
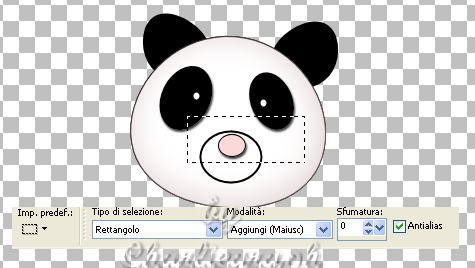
Hit the Delete key
Select None
Now I add 2 small ellipse to close the line of the mouth
And also I colored a little bit their cheecks as below
6 - Change your background to #ffc0c0
keep foreground null
and draw an ellipse like this
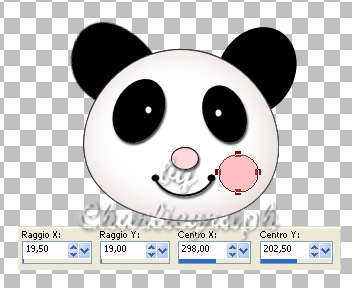
Convert to Raster Layer
Adjust - Blur - Gaussian Blur - Radius = 14
Low the Opacity to 82
Duplicate
Image - Mirror
place it at the left of the mouth
Layer - Merge Visible
Now we go to draw the body
7 - Add a new VectorLayer
Layer Arrange - Send to Bottom
And with your foreground to black and background to white
draw out an ellipse like this
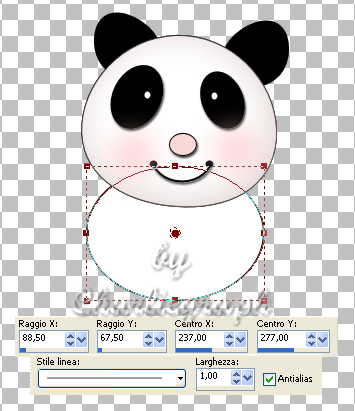
If you like shape it a little bit
or leave it so.
Convert to Raster Layer
and rename as body
Repeat from ##***## to ##***##
8 - Set your Foreground to null
and Background to black
draw out an ellipse setting like this
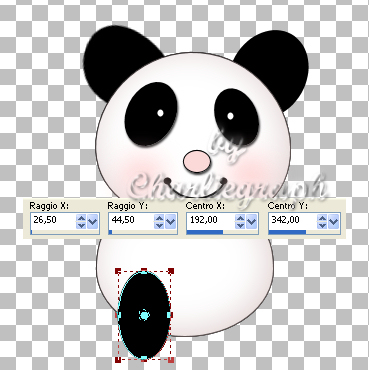
Click at Object Selector Tool
Left click on the handle at the arrow
Keep it down and turn the Ellipse to your left,
just a little bit.
See the finished to help you
Convert to Raster Layer
and rename as leg
Duplicate
Immage - Mirror
And with your Mover Tool
place it as the finished work
Repeat this step for the hands,
but the ellipse have to be just a little small than the legs
Place everything to the right place
as finished work
Layer - Merge Visible
If you like apply a drop shadow to your panda
When you are satisfied on it, save as .pspimage or .png
This is a gift from my good friend Laurie

TY hun, I love very much this one. It' very funny. LOL
Done!
I hope you enjoyed this tutorial.
If you have questions or need clarification
post a message to my Contacts.
Written at the end of May 2010
Return to Tutorials

My Tutorials are Registered at TWI

Per informazioni o suggerimenti
If you like write a message to my "Contatti"
Se hai dubbi o ti servono chiarimenti posta un messaggio nei "Contatti"
Copyright © Charlieonline.it 2002 - 2026
Tutti i diritti riservati
Torna all'inizio


Questo Sito è pubblicato sotto una Licenza (This website is licensed under a)
Creative Commons Attribuzione - Non commerciale - Non opere derivate 2.5 Italia License.