Tag Valentine 2011 ≈ PS-Tutorial
Copyright © Charlieonline.it 2002 - 2026Tutti i diritti riservati

Any resemblance to any other tutorial is purely coincidental.
Please feel free to link to this tutorial,
and/or print it out for your own personal use,
BUT do not upload, share, or re-write or translate it without permission.
Besides you may not script it and sell the script.
You may not sell works from my Presets or Tutorials
All my works are for personal use only, and with no profit-websites
A link to this site's required!
Thank you!
This tutorial was written using PS Cs5
but may be done with other versions.
Some basic PS knowledge is needed for this tutorial.
Please read my TOU's ==> HERE
Copyright © Charlieonline.it 2002 - 2026
Tutti i diritti riservati
Overlay made by The ScrappinCop
ScrappingElements from: Charlieonline ValentineScrapkit2011
and Other Elements ValentineScraps
This page's tile is
Copyright © Charlieonline.it 2002 - 2026
Tutti i diritti riservati
You can find other Tiles or Textures..... HERE
| Supplies needed: |
|
My ch-heart37.csh
My ch-Style180.asl
My ch-drawinghearts.png
My Tut-Valentine2011-Elements.psd and .png
The Bokeh Overlay from Thescrappincop
Settings
Save ch-heart37.csh in your Custom Shape folder
Extract the Bokeh Overlayin a folder of your choice
Save ch-Style180 in your Styles folder
Save all the other elements in a folder of your choice
Set your Foreground color to #da98b1 and the Background to null
Let's begin!
1 - Open a New Image 600w x 500h transparent background;
Fill your Layer with your foreground colour (#da98b1)
At the bottom of the Layer Palette, click to Add New Layer
2 - From the SC_BokehOverlays folder click
and open SC_BokehOL (1).png on Photoshop
Image - Image Size
In the new window opens change size to the Document Size from cm to percent
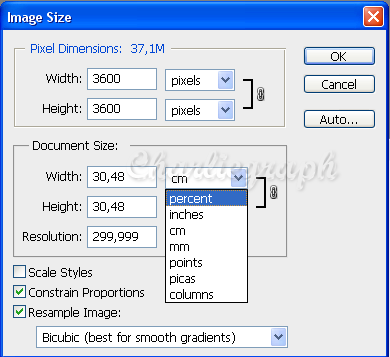
and resize to 50%
Repeat, but this time resize to 33,4%
Select - All
Edit - Copy
3 - Return to your working image and Paste it
Rename as Bokeh
In the Layer Palette change the Mode to Overlay
Duplicate
and lower the opacity to 28%
hide the layer for now, by clicking the eye icon next to it
Return to the original Bokeh Layer
4 - Select your Custom Shape tool, and
look for the ch-heart37.csh
In the CustomShape Option set as follow
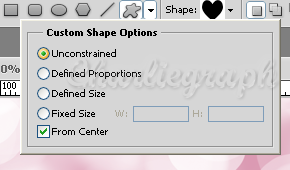
Draw your heart

Layer - Rasterize Layer
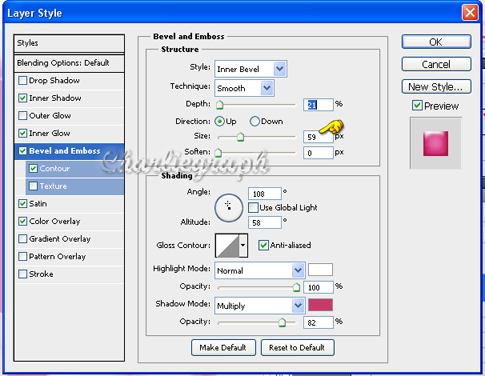
5 - Click the Styles tab
and choose the ch-Style180
In the Blending Option, click on Bevel and Emboss
and make sure it is setting as below
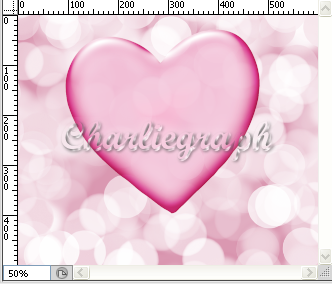
Highlight and unhide the duplicate Bokeh layer again
Your image should be something similar to this
make sure the duplicate Bokeh is selected
and go ahead
6 - Open the ch-drawinghearts.png
copy and paste it on your working image
Place it upon the heart, as the finished work
Note: Resize the drawinghearts if overflowing from the heart.
7 - Now create a New Layer
and add all the other elements from
My Tut-Valentine2011-Elements.psd or .png file
Use finished as example
Your image should be something similar to this

Put your name or watermark
Add a little border if you like
(I add 2 px and applied on it a style)
and save as .jpg or .png
But...........
What do you think to animate it a bit?
Go ahead!
I want to thank Nina from LorettabWeb
for her patience in trying to get me in the head
how to create an animation in Photoshop
You can find a tutorial she wrote about animations with PS......Here
How to glitter a particular in a tag
1 - Open the image you want to animate into Photoshop
or keep that we just finished creating
Add a New Layer
Open your Lasso Tool
and draw a selection in a point of your image as this

Layer - New - Layer via Copy
Deselet
Duplicate it twice
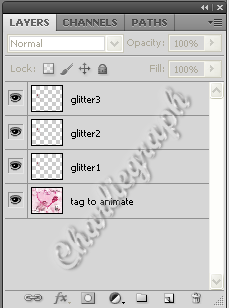
and rename the layers: glitter1, glitter2, glitter3
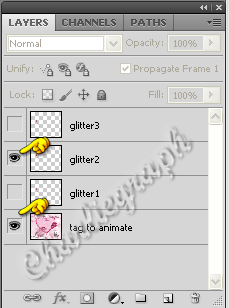
Hide glitter2 and glitter3 layers and highlight glitter1
2 - Filter - Noise - Add Noise
When the window pops up set as follow:
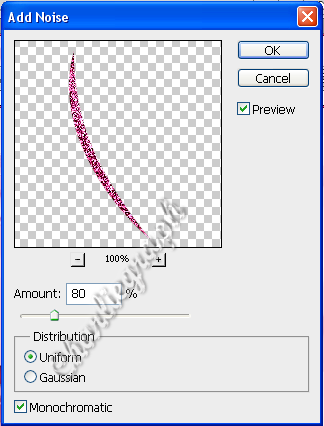
Hide glitter1 and keep hide glitter3, highlight and unhide glitter2
change the amout to 85%
Hide glitter2 and keep hide glitter1, highlight and unhide glitter3
change the amout to 90%
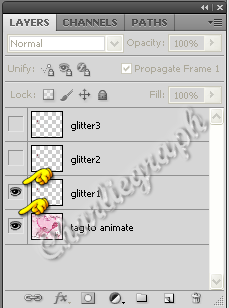
Unhide all layer
Your Layers Palette has to be like this
Now go to make our animation
Hide again glitter 2 and glitter3 layers
highlight and unhide glitter1 again
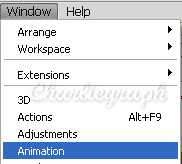
3 - Open the Animation palette from Window - Animation
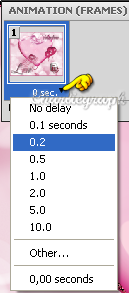
When the window pops up
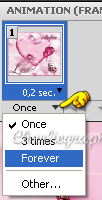
Expand the 0 sec button in the bottom panel
and select 0.2 sec from the fly-out menu.
From the Selects Looping options change in Forever
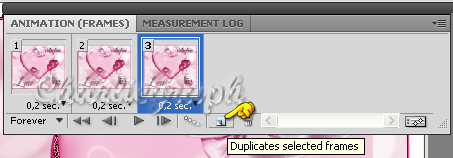
Click twice on
Duplicates Selected Frames
to have 3 frames
4 - Now you have to pay a lot of attention
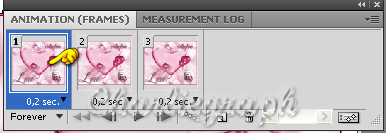
4a - In the layer palette you have to activate the layers
tag to animate and glitter1
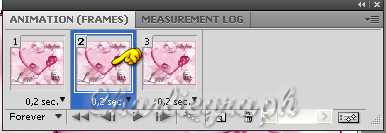
go up to the Animation panel and click on frame1
4b - Now in the layers palette hide glitter1 and unhide and highlight glitter2
go up to the Animation panel and click on frame2
4c - Now in the layers palette hide glitter2 and unhide and highlight glitter3
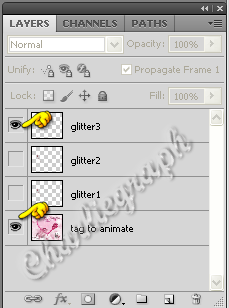
go to the Animation panel and click on frame3
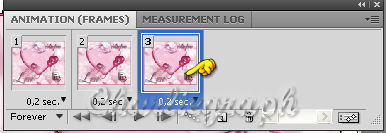
Click the Play Animation button
and watch how the animated tag played
If you are satisfied on it
and all has been set up,
close the Animation Panel!
Done!
It is time to save the image!Go up to
File - Save for Web & Devices
Make sure the file format is set to gif
change any other options if needed, and save the image!
Save a copy in .psd format too , it might serve you in another time
Thought up for Valentine Day 2011
finished to write on July 2011
I hope you enjoyed this tutorial.
If you have questions or need clarification
post a message to my Contacts.
Return to Tutorials
My Tutorials are Registered at TWI

Per informazioni o suggerimenti
If you like write a message to my "Contatti"
Se hai dubbi o ti servono chiarimenti posta un messaggio nei "Contatti"
Copyright © Charlieonline.it 2002 - 2026
Tutti i diritti riservati
Torna all'inizio


Questo Sito è pubblicato sotto una Licenza (This website is licensed under a)
Creative Commons Attribuzione - Non commerciale - Non opere derivate 2.5 Italia License.