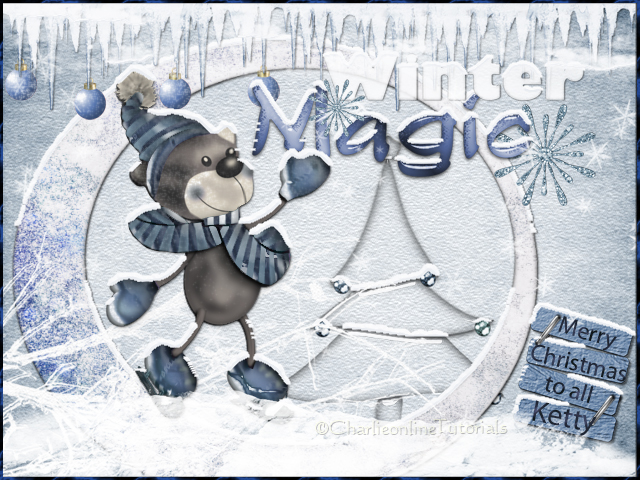
WinterMagic ≈ PS-Tutorial
Copyright © Charlieonline.it 2002 - 2026Tutti i diritti riservati
Return to Tutorials
Any resemblance to any other tutorial is purely coincidental.
Please feel free to link to this tutorial,
and/or print it out for your own personal use,
BUT do not upload, share, or re-write or translate it without permission.
Besides you may not script it and sell the script.
You may not sell works from my Presets or Tutorials
All my works are for personal use only, and with no profit-websites
A link to this site's required!
Thank you!
This tutorial was written using PS Cs5
but may be done with other versions.
Some basic PS knowledge is needed for this tutorial.
This page's tile is
Copyright © Charlieonline.it 2002 - 2026
Tutti i diritti riservati
You can find other Tiles or Textures..... HERE
| Supplies needed: |
|
I don't remember the source of the brushes used for this tutorial
but all property rights and © are acknowledged to their rightful owners.
Charlieonline has no right on them.
The skater is ©Ellanoir
and it is a part of New Beginninngs scrapkitAll the other elements are part of my Winter Magic scrapkit
and are ©charlieonline.it
Filter:
AlienSkin EyeCandy 5-Nature/SnowDrift
Settings
Extract and save the brush_WinterMagicTut.abr
to the brush folder of PS or other of your choice
Save my ch-small snow.f1s settings for SnowDrift
in a folder of your choice
Extract and open the ch-WinterMagicBT1.png
ch-WinterMagicElements-snowed-Tut.psd
ch-WinterMagicElements-snowed-Tut.psd
and Ellanoir_e50-reworked.png
and minimize them to your Ps workspace
Now .....
Let's begin!
1 - Open my ch-WinterMagicBT1.png
Image - Duplicate
and close the original
Image - Image size
In the new window opens change size to 640w x 480h
Constrain Proportions unchecked
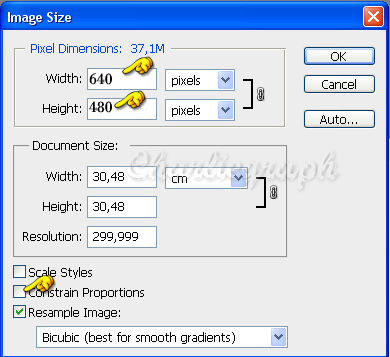
click OK
Name it Base
Filter - Texture - Texturizer
and set the window opens so
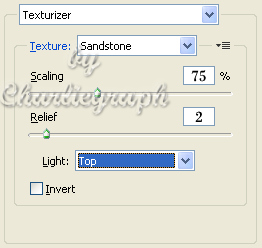
Click OK
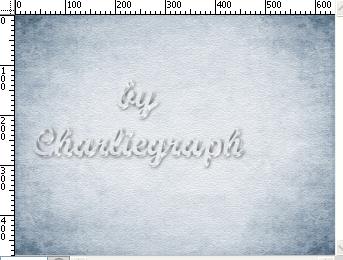
Your image should look like this
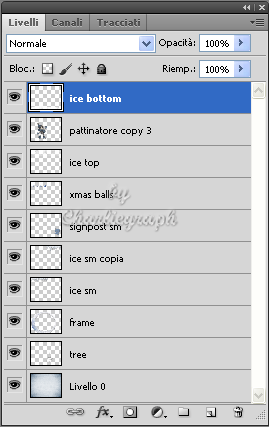
2 - At the bottom of the Layer Palette click the Create New Layer button
and rename as Frame
Go up to ch-WinterMagicElements-Tut.psd
highlight the Frame layer
**and with your mouse drag it on your working image
place it as finished work**
3 - Create a New Layer
and rename as BrushTop
Change your foreground to white
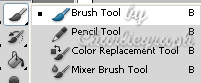
Click on the Brush Tool on the ToolBox
Reset the brushes and load the brush_WinterMagicTut.abr
Scroll through the brush tip previews
and look for the n. 807 brush tip
Click to select it
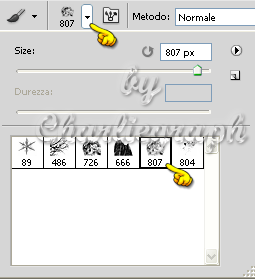
Keep the same settings
click where indicated below to brush your canvas
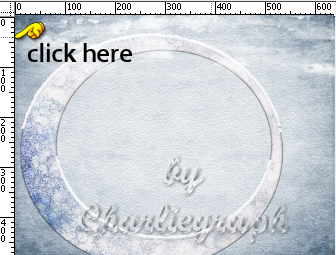
4 - Create a New Layer
and rename as BrushBottom
Select your brush tip previews again
and look for the n.666 brush
Click to select it
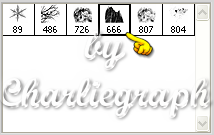
change size to 715
and click where indicated to brush your canvas
5 - Return to your Base layer
make sure it is selected
Add a new layer by going at the bottom of your Layer Palette
Go again to ch-WinterMagicElements-Tut.psd
highlight the tree layer
or if you prefer the tree-snowed
Repeat ** **
6 - Now highlight the Frame layer
make sure it is selected
Go again to ch-WinterMagicElements-Tut.psd
highlight the ice sm layer
drag it on your working imagen
duplicate layer and place them as finished work
Return to ch-WinterMagicElements-Tut.psd
highlight the signpost sm
or if you prefer the signpost sm-snowed
Repeat ** **
and the xmas balls
Repeat ** **
7 - In the layer palette highlight again your ice top layer
Go to Ellanoir_e50-reworked.png
or the ones I have reworked and snowed
Repeat ** **
This is what you have till now:
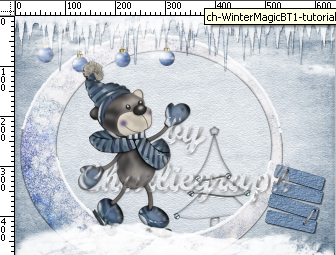
8 - Now return again on your ice bottom layer
and add the Winter and the Magic words,
and also the snowflakes
or if you prefer use the snowed ones
Use finished as example
Note: Add all in different layers!
9 - Create a New Layer
and rename as Brushtree
Select your brush tip previews again
select the brush n.476
brush your canvas and place it as finished
Add a new layer again
and rename as Brushflakes
select the brush n. 89
move your brush tool onto your canvas
click and drag it as you like
or use finished work as example
Note: if you used the simple elements and not those already covered with snow,
use AlienSkin EyeCandy 5-Nature/SnowDrift plugin to snow them
In this case use the new setting for SnowDrift attached in the supplies.
named ch-small snow.f1s
So open the Plugin, click on the Settings folder
then at the Manage button at the bottom.
On the open popup click Import
and look for the folder where saved my ch-small snow.f1s
click on it and you will see it on the User Settings of your plugin.
Click on it if you like or use your settings
When you are satisfied on it
Put your name or watermark
Add a little border if you like
and save as .jpg or .png
Done!
Hope you have enjoyed this tutorial.Written on February 2012
Return to Tutorials
My Tutorials are Registered at TWI

Per informazioni o suggerimenti
If you like write a message to my "Contatti"
Se hai dubbi o ti servono chiarimenti posta un messaggio nei "Contatti"
Copyright © Charlieonline.it 2002 - 2026
Tutti i diritti riservati
Torna all'inizio


Questo Sito è pubblicato sotto una Licenza (This website is licensed under a)
Creative Commons Attribuzione - Non commerciale - Non opere derivate 2.5 Italia License.
Pagina aggiornata... sabato 17 ottobre 2015
Tempo di caricamento 0.06 secondi.
Copyright © Charlieonline.it 2002 - 2026
Tutti i diritti riservati