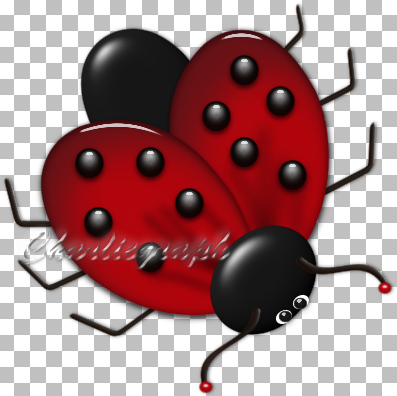
Tutorial PSP - How to Make LadyBug
Copyright © Charlieonline.it 2002 - 2026Tutti i diritti riservati
Return to Tutorials
Please read my TOU's ==> HERE
Copyright © Charlieonline.it 2002 - 2026
Tutti i diritti riservati
Tutorial written by ©charlieonline graphics
Any resemblance to any other tutorial is purely coincidental.
Please feel free to link to this tutorial,
and/or print it out for your own personal use,
BUT do not upload, share, or re-write or translate it without permission.
Besides you may not script it and sell the script.
You may not sell works from my Presets or Tutorials
All my works are for personal use only, and with no profit-websites
Anything made from my tutorials is for personal use,
and may not be used on commercial sites or blogs.
When displaying the results from my tutorials, a link to this site is required.
It goes without saying that my resources cannot be used for anything
pornographic, obscene, deflamatory, or in violation of the law.
Thank you!
This tutorial was written using PSP9
but may be done with other versions,
and assumes you have a good working knowledge of PSP and its tools.

Supplies needed:
SK Ovals5 Shape from Scrap-Stuff-with-PSP
You can find it ==>
HERE
or ==> HERE
for other Shapes ==>HERE
Plugins:
AlienSkin EyeCandy5 - Impact - Bevel and Glass
Other Funnies ==> HERE
Settings Extract and place the SK Ovals5 Shape to your Presets Shapes folder
Set your Foreground to Null
and Background to # b2050d - Black - White
Remember to save often.
Let's begin!!
1 - Open a new image 500x500 pixel
Open your Preset Shapes tools

pick out the SK Ovals 5.PspShape
and with the Background setting (the foreground null)
make a draw as this below:
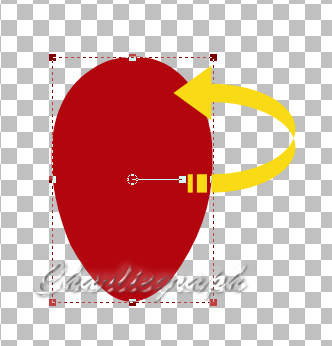
now you have to rotate the draw, till to have as follow:
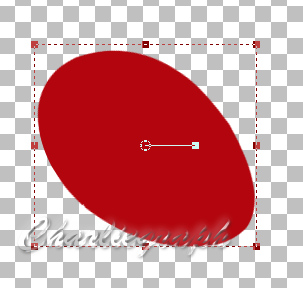
Duplicate it
Return to the original vector
Convert to Raster Layer
and rename as: left side
Now return to the duplicate vector
and rotate the draw as follow:
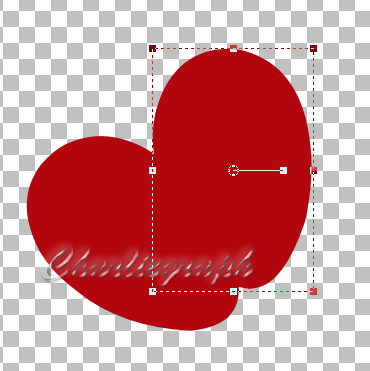
When you have placed it in the right location
Convert to Raster Layer
and rename as: right side
Layer - Arrange - Move Down
2 - Return to your left side layer
Change your background color to black
Open your Preset Shapes tools again
and with the SK Ovals 5.PspShape
make a draw as follow
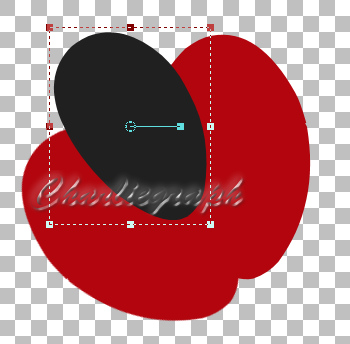
place it as abow
Convert to Raster Layer
Rename as: body
Layer - Arrange - Send to Bottom
3 - Return again to your left side layer
Open your Preset Shapes Ellipsis tools
choose Ellipsis and make a draw as follow
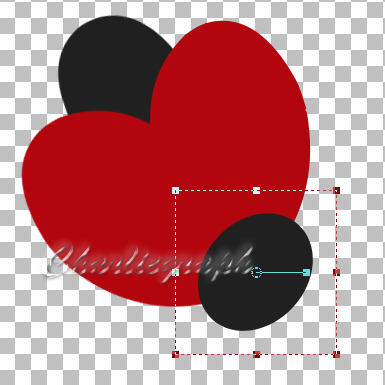
rotate and place it as abow
Convert to Raster Layer
Rename as: head
Now we have to re-working our pieces
4 - First go to body layer
Make sure you have activate it
Effects - Plugins - AlienSkin EyeCandy5 Impact - Bevel
with this settings:
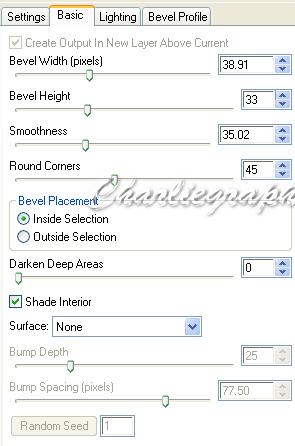
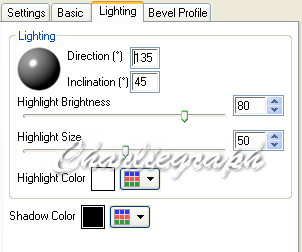
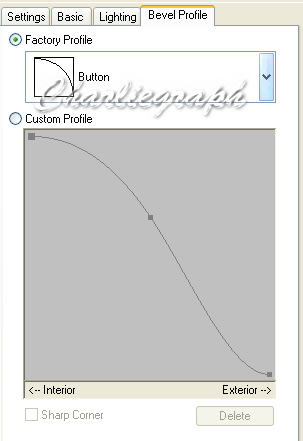
Make the same for the head
Then go to the left side layer
Make sure you have activate it
Duplicate it
Effects 3D - Cutout
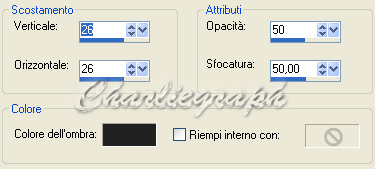
Rename this layer left cutout
Afterwards go to the right side layer
Make sure you have activate it
Duplicate
and apply the effect cutout again
but change Vertical to 46
Rename this layer right cutout
5 - Return again to the right side layer
Make active your PenTool

and make some draw as the follow image:
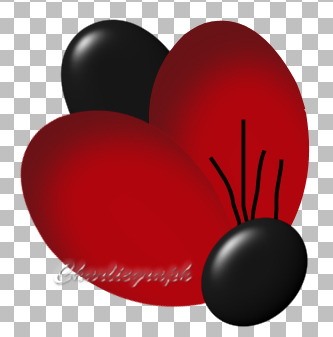
Convert to Raster Layer
Adjust - Blur - Gaussian Blur
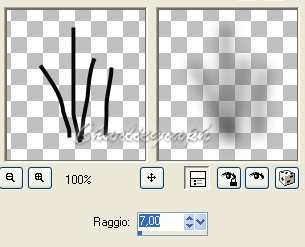
Rename this layer right shadow
Return to the left side layer
and make the same thing
as finished work. Rename this layer left shadow
NOTE
At this point if you like,
you can apply the plugin Impact - Glass to the flies.
In this case you must go on as follow:
6 - Close the head and body layers
close the left side, the left cutout and the left shadow layers
Make active the right side layer
Layer - Merge Visible
Effects - Plugins - AlienSkin EyeCandy5 Impact - Glass
as follow
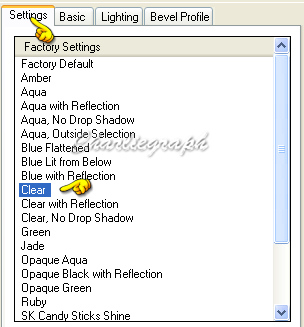
Repeat this step also to the left flies
Enclose again all the layer
Now go on with the other things!
7 - Return to the right side layer
Open your Preset Shapes Ellipsis tools
but this time choose Circle
keep the background to black
and draw a small bubble/poi as follow
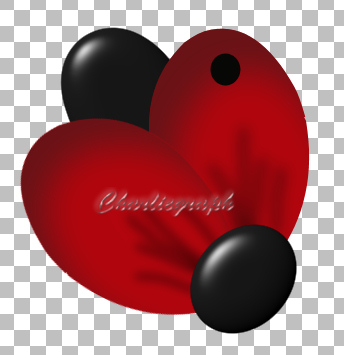
Convert to Raster Layer
Effects - Plugins - AlienSkin EyeCandy5 Impact - Bevel
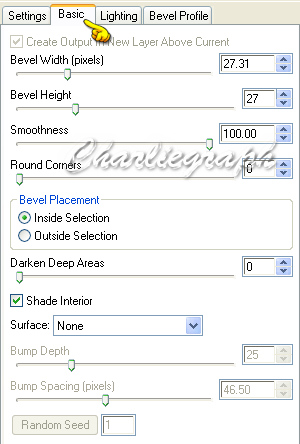
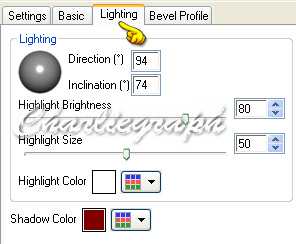
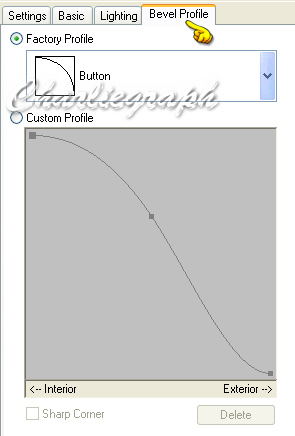
Effects - Plugins - AlienSkin EyeCandy5 Impact - Glass (default settings)
Duplicate it 9 time and place them as finished image
(5 pois to the side right and 5 to the left one)
Now we have to draw six small pawes
8 - Open again your PenTool

and draw a paw as below
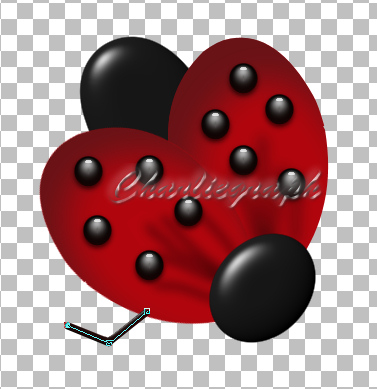
Convert to Raster Layer
Effects - Plugins - AlienSkin EyeCandy5 Impact - Bevel
Click to Basic and use these settings
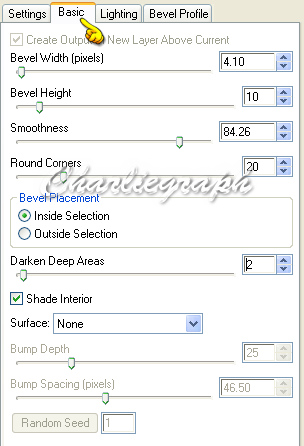
Layer - Arrange - Send to Bottom
For the other paws
take as example the finished work.
At least the Eyes
Open again your Preset Shapes Ellipsis tools
and choose Ellipsis
9 - Make active the head layer
change the background to white
draw 2 small ellipsis and place them as follow
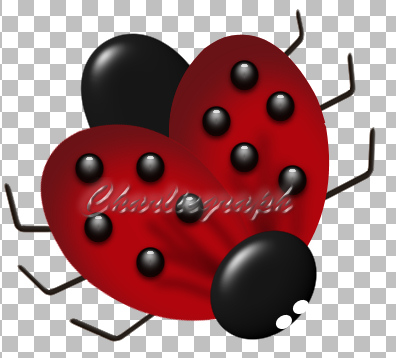
Convert to Raster Layer
Now change the background color to black again
draw 2 small ellipsis for the pupils
(a little bit small than the white ellipsis)
and place them as finished work.
Effects - Plugins - AlienSkin EyeCandy5 Impact - Glass - Clear (default settings)
And the Feelers/Horn
10 - Make the body layer active
With your Pen Tool with the settings below

draw a small horn like this
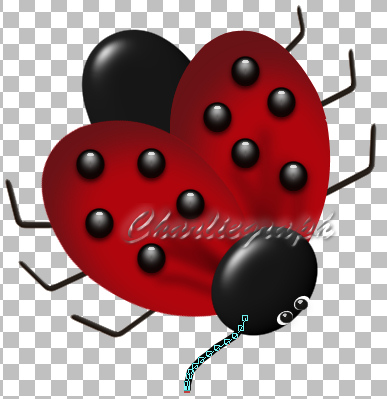
Convert to Raster Layer
and place it as above
Effects - Plugins - AlienSkin EyeCandy5 Impact - Bevel
as the previous settings
Now, if you like, you can add a small red ball
So.... change the Background to #b2050d
and with the Presets Shape Ellipsis, draw a small ball
Convert to Raster Layer
and apply the AlienSkin EyeCandy5 Impact - Bevel
(the same settings used for the bubbles/pois)
When you are satisfied on it,
and all pieces or bit are in the right position
(as the finished image)
Layers - Merge Visible
and save as .pspimage or .png
Done!
Hope you have enjoyed this tutorial.
If you have any questions, please write a message in to my Contatti
Written at May 2009
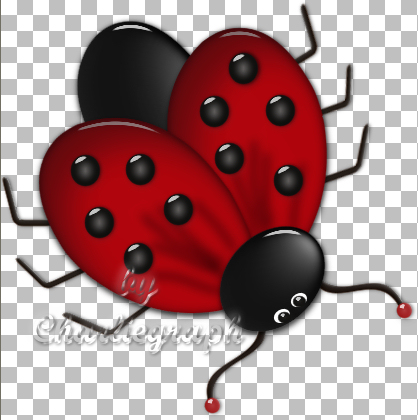
Below the example with the plugin Impact/Glass also for the head and body
Return to Tutorials

My Tutorials are Registered at TWI

If you like write a message to my "Contatti"
Se hai dubbi o ti servono chiarimenti posta un messaggio nei "Contatti"
Copyright © Charlieonline.it 2002 - 2026
Tutti i diritti riservati
Torna all'inizio


Questo Sito è pubblicato sotto una Licenza (This website is licensed under a)
Creative Commons Attribuzione - Non commerciale - Non opere derivate 2.5 Italia License.