Tutorial PSP - How to Make TopHat
Copyright © Charlieonline.it 2002 - 2026All Right Reserved

Return to Tutorials
Please read my TOU's ==> HERE
Copyright © Charlieonline.it 2002 - 2026
All Right Reserved
Tutorial written by ©charlieonline graphics
Any resemblance to any other tutorial is purely coincidental.
Please feel free to link to this tutorial,
and/or print it out for your own personal use,
BUT do not upload, share, or re-write or translate it without permission.
Besides you may not script it and sell the script.
You may not sell works from my Presets or Tutorials
All my works are for personal use only, and with no profit-websites
Anything made from my tutorials is for personal use,
and may not be used on commercial sites or blogs.
When displaying the results from my tutorials, a link to this site is required.
It goes without saying that my resources cannot be used for anything
pornographic, obscene, deflamatory, or in violation of the law.
Thank you!
This tutorial was written using PSP9
but may be done with other versions,
and assumes you have a good working knowledge of PSP and its tools.

Supplies needed:
ch-MyAlphaChanelTopHat2010 and my ch-PspGradient3 ==> HERE
SK Random 171 from Scrap-Stuff-with-PSP
==> Download the set - 180 Shapes <==
Settings
Extract and open ch-MyAlphaChanelTopHat2010 to your PSP workspaceExtract and save my ch-PrimoPiano-Sfondo3.PspGradient to your Gradient folder
Extract and save the 180 Shapes set to your Preset Shapes folder
Set your Foreground to Black
and Background to #2d2d2d Remember to save often!
Let's begin!!
1 - Open my ch-MyAlphaChanelSelection-TopHat2010
Duplicate and close the original
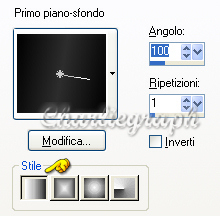
set your Foreground to Gradient as bellow
Selections - Load/Save Selection - Load Selection from AlphaChannel
and click on Selezione #1
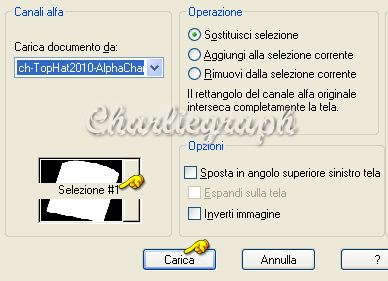
Load
Flood Fill with the Gradient setted
Select None
2 - Click on your Preset Shapes Ellipsis Tool - Ellipsis on the left
Turn off your Foreground colour
and set the Background to to my ch-PrimoPiano-Sfondo3.PspGradient
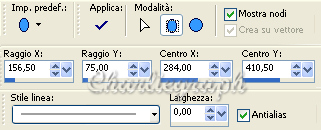
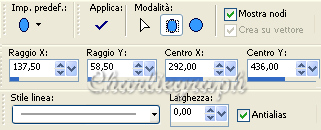
draw out an Ellipsis as the following setting
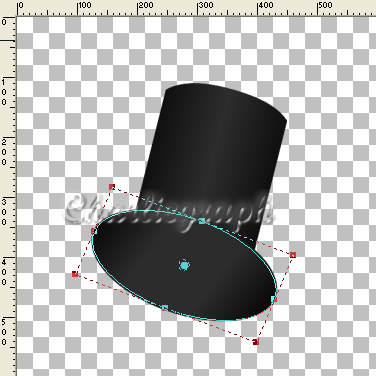
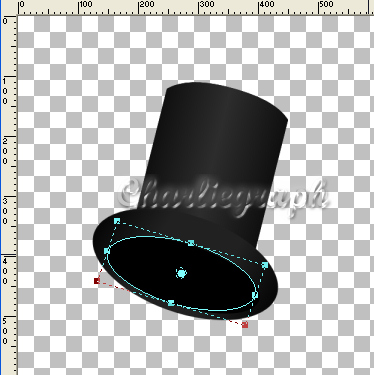
Your image should look like this
Convert to Raster Layer
3 - Change your Background to Black
Click again on your Preset Shapes Ellipsis
and draw out an ellipsis as the following setting
Your image should look like this
Convert to Raster Layer
Layer - Merge Visible
4 - Turn out and set your Foreground to #560bbb
and change your Background to White
Change the Foreground to Gradient and set as bellow

Open your Preset Shapes tool
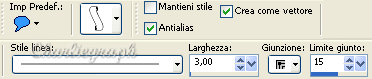
look for SK Random 171 as setted
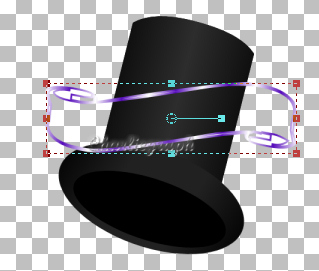
click on it, draw and place it as bellow
Convert to Raster Layer
Rename as SheepSkin
5 - Open your Magic Wand tool
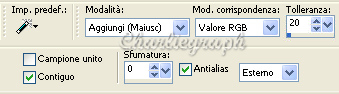
and click as follow

Selections - Invert
Add a New Raster Layer
Selections - Modify - Contract 3 pixels
Flood fill with white color
Select None
Layer - Arrange - Move Down
Return on the SheepSkin Layer
Layer - Merge Down
6 - Open your Text Tool and choose your font
I have used Perpetua Titling MT size 47 - Bold
But you can use what you like
Write "HAPPY 2010"
Convert to Raster Layer
Effects - Distortion Effects - Wave
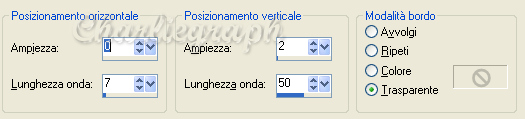
and place on the SheepSkin
7 - Layer - Merge Visible
and save as .pspimage or .png
Done!
Hope you have enjoyed this tutorial.
If you have any questions, please write a message in to my Contatti
And if you like it, please leave a message on my TagBoard
Written on December 2009
Return to Tutorials

My Tutorials are Registered at TWI

Per informazioni o suggerimenti
If you like write a message to my "Contatti"
Se hai dubbi o ti servono chiarimenti posta un messaggio nei "Contatti"
Copyright © Charlieonline.it 2002 - 2026
All Right Reserved
Back to top


Questo Sito è pubblicato sotto una Licenza (This website is licensed under a)
Creative Commons Attribuzione - Non commerciale - Non opere derivate 2.5 Italia License.