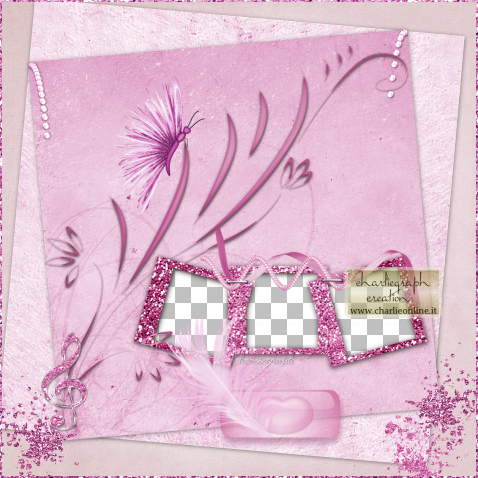
Tutorial PSP - How to Make QuickPage
Copyright © Charlieonline.it 2002 - 2024All Right Reserved
Return to Tutorials
Please read my TOU's ==> HERE
Copyright © Charlieonline.it 2002 - 2024
All Right Reserved
Tutorial written by ©charlieonline graphics
Any resemblance to any other tutorial is purely coincidental.
Please feel free to link to this tutorial,
and/or print it out for your own personal use,
BUT do not upload, share, or re-write or translate it without permission.
Besides you may not script it and sell the script.
You may not sell works from my Presets or Tutorials
All my works are for personal use only, and with no profit-websites
Anything made from my tutorials is for personal use,
and may not be used on commercial sites or blogs.
When displaying the results from my tutorials, a link to this site is required.
It goes without saying that my resources cannot be used for anything
pornographic, obscene, deflamatory, or in violation of the law.
Thank you!
This tutorial was written using PSP9
but may be done with other versions,
and assumes you have a good working knowledge of PSP and its tools.

Supplies needed:
My ch-onlyframe1 ==> HERE
My ThinkPink-MumScrapKit ==> HERE
Other QuickPages ==> HERE
Other ScrapKits ==> HERE
HERE <== a Contestorganized on the NuvolaBianca Forum
from my friend Ondina
Settings
Download, extract and open the kit the papers and the frame
and minimize them to your Psp workspace
Remember to save often!
Let's begin!!
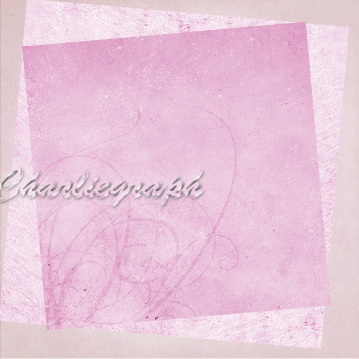
1 - Open the Papers Kit ch-ThinkPink-MumScrapKit-PP.pspimage
and choose paper on Raster 5
Copy and Paste as New Image
2 - Return to the PapersKit and now choose the one on Raster 3
Copy, return to your working image and paste as a New Layer
Resize to 90% (Resize all level not checked)
Image - Rotate - Free Rotate 5 degrees Right
Place it as the finished work
3 - Open again the PapersKit and copy the one on Raster 1
return to your working image and paste as a New Layer
Resize to 80% (Resize all level not checked)
Image - Rotate - Free Rotate 5 degrees Left
Place it as the finished work
Layer - Merge - Visible
Rename it paper
See below what you have to get
Now you can close the PapersKit
4 - Open the kit ch-ThinkPink-MumScrapKit.pspimage
and choose the layer doodle2
Copy, return to your working image and paste as a New Layer
Place it as the finished work
Put your work aside for a time!
5 - Open the ch-onlyframe1.pspimage
Resize to 85% (Resize all level not checked) and duplicate twice
rename them frame1, frame2, frame3
Go to frame1
Make sure the layer is active
Image - Rotate - Free Rotate 15 degrees Right
Adjust-Sharpness-Sharpen
Go to frame3
Make sure the layer is active
Image - Rotate - Free Rotate 15 degrees Left
Adjust - Sharpness - Sharpen
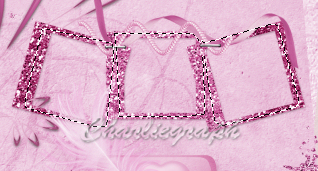
Place the frames as finished work
Layers - Merge - Visible
Copy
6 - Return to your working image and paste as a New Layer
Place it as the finished work
Remane it as frame
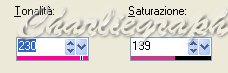
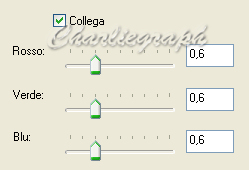
Adjust - Hue and Saturation - Colorize
Open your Freehand Selection with Feather = 30
and draw a selection like below
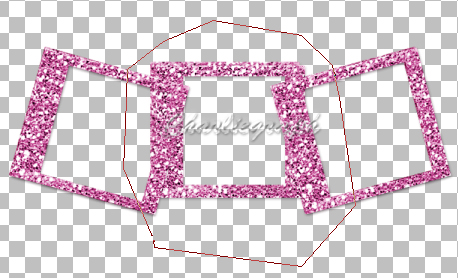
Selections - Invert
Adjust - Brightness and Contrast - Gamma Correction
Selections - Select none
Note: If you like you can use the frame1
of the ch-ThinkPink-MumScrapKit
but it is a little small than this one
Be Continue!
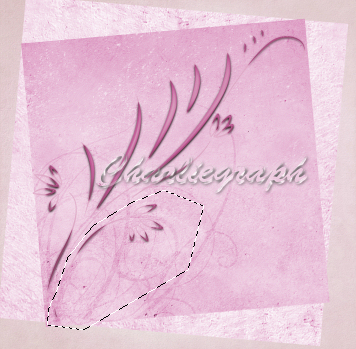
As you can see, the frame is over the doodle2
If you like leave it so, otherwise make as below
7 - Close the frame layer, go to your doodle2 layer
Make sure you have it active
Open your Freehand Selection with Feather = 0
and draw a selection like below
Cut
Selections - Select None
Open again the frame layer
Make sure you have it active
and paste as New Layer
Place it as finished work
8 - Make active again the MumScrapKit
and copy freefall-pearl1 and freefall-pearl2
Return to your working image and paste them as finished work
9 - Then you have to copy these elements:
glitt1 and glitt2
pearlwave4, ribbon2, staple2, noteglitt, butterfly2
heart4, the tag, and the feather
Paste all on your working image
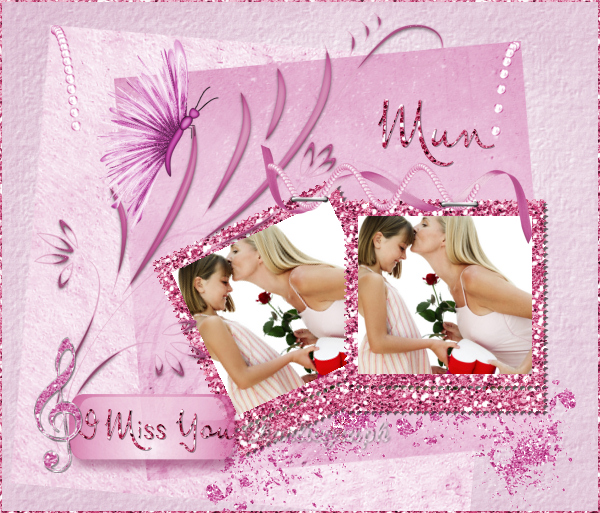
take for example the finished work
Note: I lowed the Opacity to 80 on the layer of the tag.
10 - Return again to the frame layer
Make sure you have it active
Open your Freehand Selection with Feather = 0
and draw a selection like below
make the paper layer active
Press the delete key
Selections - Select none
11 - Now if you like,
you can apply a little shadow to all the elements
I use these settings:

12 - Add your text and a border if you like
Add your watermark or name
When you are satisfied on it,
and all elements are in the right place
(see my finished work)
Layers - Merge Visible
and save as .pspimage
or if you prefer as .png
Done!
Hope you have enjoyed this tutorial.
If you have any questions, please write a message in to my Contatti
Written on October 2009
Another example
Return to Tutorials

My Tutorials are Registered at TWI

Per informazioni o suggerimenti
If you like write a message to my "Contatti"
Se hai dubbi o ti servono chiarimenti posta un messaggio nei "Contatti"
Copyright © Charlieonline.it 2002 - 2024
All Right Reserved
Back to top


Questo Sito è pubblicato sotto una Licenza (This website is licensed under a)
Creative Commons Attribuzione - Non commerciale - Non opere derivate 2.5 Italia License.